Tuesday, April 17, 2012

Etsy Dreams: 5 Arts/Crafts I WISH I could do...

As I sat here, considering what to write about this morning it occurred to me to think about the arts and crafts that I WISHED I could do.  I am a dabbler.  Once called a "jack of all trades, master of none" by a teacher I loved, it rather sums me up!  I can create some lovely things, but the time, energy and level of artistry it takes to make the items below?  Perhaps not so much, eh?

I thought it might be fun to cruise through Etsy and find things I WISHED I could do.  Here's my list.

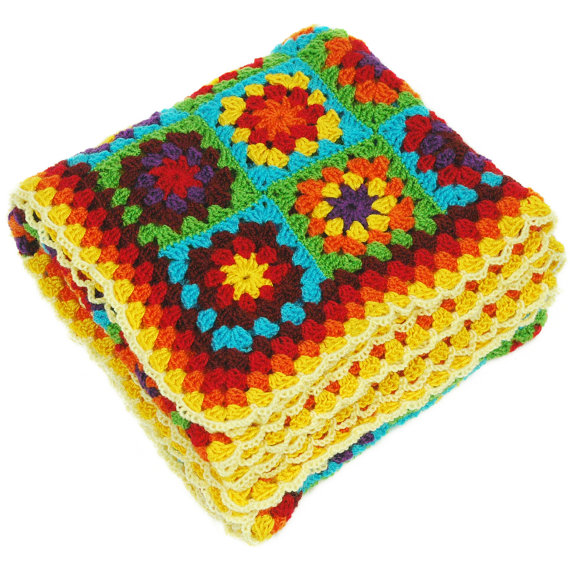
Let's start with a craft that I cannot do, at least at this point (but I have pinned some tutorials that PROMISE to help me...).  Crochet.  Can't do it.  Can't get it right.  Nope.  More than anything THIS is what I want to make: 

I love the colors of Granny Squares.  I love how you can make them with bits of this and that.  Well, some people can.  I've tried.  My "squares" have always been anything BUT!  If you have advice on this one, I'd be forever grateful!

Let's consider painting.  My brother (an incredible artist) got ALL the drawing genes from my parents.  I recall a sketch I did on the blackboard while teaching 2nd grade was of a horse - my students thought it was an elephant.  I go with stick figures now...  How about the ability to produce this?  How can you resist it?  She will create it for you from a photo!  It's pastels - how wonderful!


I love blue.  This item on Etsy has caught my eye before.  I think I "favorited" it at one point.  It is a ceramic luminary.  I love the stars.  I have never tried ceramics, but if I did and if I could, I would totally make this:


I love wood.  I love the feel.  I love the look.  Hubby works in wood and does some wonderful things.  If I could work in wood I'd like to make this:


This chair is made from a burl.  According to Wikipedia, a burl is "a tree growth in which the grain has grown in a deformed manner."  How beautiful!

I sew and quilt, as many of you know.  But this?  This is a piece of art:


I love her colors and her design.  The craftsmanship is incredible.  Someday, when I grow up, I want to be able to create this!!

What sort of arts and crafts do YOU wish you could do?
Have a wonderful day,
Carrie

Monday, April 16, 2012

Monday Mining: Flower Power!

I am working on flower ideas for the Children in the Art's Day coming up.  I will be out front of the Historical Society sharing information on the Victorian "Art of Flowers" and in doing so, I've been "mining" for flower ideas. 

I thought I'd do today's post on DIY flowers!  Let's see what blooms, shall we?  :o)

How about a tissue paper flower made using a golf ball?  Really!!  Pop over to LollyChops and see how!

We know I have to do some with fabric, here's some shabby chic ones with a wonderful tutorial by SnowyBliss!  


Let's try another medium, paper and a real branch!  We have plenty of those around here!!  This is a Martha Stewart idea and I love it!


Here's another Martha Stewart idea, this time using crepe paper.  There are quite a few different ones shown in the wedding section.  This one looks GREAT!  Go check them out!


How about paper and buttons?  Here's a garden I found over at Cosmo Cricket!


Felt!  How soft and sweet!  I found this idea at How Joyful.  She did a video to teach us how to make these lovelies!!  Don't you just want to zip over and check it right out?  Oh... did I mention she's on Pinterest, as well?


Well, I'd better stop there or I won't get ANYTHING else done here!  Lol!  Hope you have fun checking these out!  Let me know if you give any a try.  I'll add a Linky Tool below were we can post more because I think I'll be back later to add to this!  Muahahahaha!

Quilty hugs,
Carrie


And the winner is...

... Holly!

Congrats out to you, HollycraftsShe does some of the sweetest applique's imaginable!

Message me with you address and we'll chat!

Quilty hugs,
Carrie

Sunday, April 15, 2012

How to: Lace & Fabric Throw Pillow

 Good morning, all!

I was toying around with what to do with more of the lovely fabric I got this week and thought it would be fun to mix it up a bit with some lace goodies.  My girls selected the doily, a vintage piece I picked up in a box of treats some years ago.

Here's a quick throw pillow you might want to try!

I started by looking at the lace and figuring out how big I could make the pillow based on that.  I added 1/2" to each side and cut the fabric that size.  There was a bit of directionality to the print, so that helped me decide how to cut it, as well.


I sewed the two pieces together, pressed open the seam and then centered the doily and pinned it along the seam.  That will form the top edge of the pillow.


Next, I sewed, using a narrow zig zag stitch around the design in such a way that it wouldn't be noticed. 


At this point, I turned it inside out and sewed along the edges, leaving a 3" opening on the bottom to fill the pillow.  I also pinned the lace back out of the way, so it wouldn't get accidentally caught.


Time to turn it right side out and stuff!


Once I stuffed it, I thought it needed just a bit more for decoration - it was rather plain.  So, I pulled out my little "button maker kit" and used what was there to make the last two buttons I could with that one!  If you have never played with one of these, I heartily recommend it!  They are way fun!  I'll do a posting on how to, when I get myself some more!


I took the two buttons and sewed them one to another THROUGH the pillow and pulled it snug.  I love it!


Hope everyone has a lovely Sunday!
Carrie


Saturday, April 14, 2012

Japanese Print Wallhanging - Project #1 from fabric exchange!

Good morning, fabric friends!

I started with the smallest piece of fabric I exchanged the other day and made a wall hanging!


You'll need:
  • Pretty fabric 
  • Foam Core
  • Spray Adhesive
  • 2 brads
  • Tape
  • Iron
  1. Press the fabric to get it nice and smooth.
  2. Cut the foam core 1/2- 3/4" smaller ON ALL SIDES so you can wrap the fabric around it.  I THOUGHT I had trimmed it enough, if seemed like I had, but lesson here: I didn't!  
  3. Decide where to place the brads for the best hanging for you.  I didn't want the thread I was using to show, so I put them 2" down and 1" in.


     4.  Poke the brads in through the back, so the rounded part shows there.  Cover the picky part of the brad with tape.  This will be UNDER the fabric.

 
 5. Using your spray adhesive, put some around the edges on the INSIDE - what will be UNDER the fabric.  Place the fabric on it and smooth it out.  Wrap the edges over and add a bit more spray adhesive to the back sides to hold the fabric down.


6.  Tie your wire/thread around one brad, measure out how much you need, cut it and then tie it off on the other brad.

7.  Hang it up!!


This project was quick, easy and impressed the fam!  Let's see what I try next!

Don't forget to stop by the post to try and win a piece of this gorgeous stuff!  I am particular to the purples and blues... just sayin'!

Till tomorrow, happy crafting today!
Carrie

PS. BTW.... that green around the wall hanging?   That's my bedroom!!  If you follow my Pinterest boards you'll know I like a different green - got a gallon and can't WAIT to change it up!!

Friday, April 13, 2012

I want to share!!

Good evening, all!

I have fabric to share!  All you need to do is pop back to yesterday's post about the 5 ideas for a yard or less of fabric and leave a comment or idea at the bottom for what I could use it for and on Sunday night one follower will win their choice (if I haven't made something with it) of the fabrics I traded for this week!


You are a creative lot, I know it!!  Come on in and give me ideas!

Have a fabulous day, everyone!
Carrie

Thursday, April 12, 2012

5 Great Project Ideas for a Yard or Less Fabric + 1 yd to SHARE!

Good morning, friends!

I had a wonderful opportunity yesterday to make a new friend and trade fabric!  Yup - 28 yards left my house and 28 yards came back!  Muahahahaha!

Here's what I came home with:


..a beautiful selection of lots of blues and purples!  I am in heaven!  Thanks, Julie!  :o)

Now, the $25,000 question is, WHAT do I do with these?   Part of me just wants to caress them - I am SURE you've had fabric like that, or the equivalent!

But NO!  I will USE these beauties... but to what end?  I thought I might do a bit of searching (yes, I will refer to my Pinterest fabric/textile board...) and took some time last night to do a bit peeking around for ideas.

Listed are the top 5 on my list to try first.  THEN... I NEED YOUR IDEAS!  Post your idea/ideas using the Linky Tool at the bottom of the post and one follower gets their choice of 1 yard of this gorgeous fabric!!! OMG!! YES!!!

Here are some ideas to get you thinking:
1. Fabric Bowl  - you can Google "How to Make a Fabric Bowl" or stop by this site to see how.  Are you even more visual?  How about a YouTube Video from Crafty Gemini?  She does a GREAT job!


2. Ruffled Apron - stop on by Northern Cottage for a peek at a super cute ruffled apron!

I have two very boring ones... this one uses a couple different fabrics - perfect with the coordinates I got!  Haha!!

3. Draw String Bag - here is a wonderful tutorial (VERY well written by Jen, at In Color Order) for a sweet lined draw string bag.  I can totally see several of the Japanese prints made up in to this!  Don't you just want to give it a whirl?

4.  A new lamp shade - JUST what I need for my computer area and the one in the bedroom!  I went out and about looking for lampshade ideas and the one I liked the most was at Designsponge.  Check it out!


5.  Foam Window Seat Bench Cover - we have this perfect little spot that is currently a toy depository that would be just right to make a squishy seat cover for!  I LOVE IT!!  At Urbane Jane they took a coffee table and made a covered bench from it - I have the seat, just need the comfy part! I think  I could modify their idea...


How about YOU?  What would you do with one of the 28 yards of fabric I got today?  Find a fun idea and list it below by clicking on the CLICK HERE TO ENTER button.  Add your photo and viola - YOU ARE ENTERED!!!  How fun is that?

Hope you join us!
Carrie

POST YOUR IDEAS HERE: