Tuesday, March 13, 2012

Fabric Covered Wastebasket

Good morning!

As we determined yesterday, it would appear that I am better working in fabric than other mediums - not to say I won't dabble, don't worry, I will! That being said, I'm back to fabric for today's posting.

I tackled the wastebasket in the bathroom. Poor, innocent thing - it had NO idea it was about to become victim to my creative whimsy! This is actually a project I really didn't find too much of on either Pinterest OR the Internet, much to my surprise.  Am I the only person on the planet who's bathroom wastebasket ISN'T round?

This project required a bit of measuring and sketching, but in the end, I was pretty happy with the result.

For starters, you'll need to find out the size of the container.  I measured the sides (7" a the top and 5" at the bottom) and the front/back (11" at the top and 9" at the bottom and then the height (16").  Then I added 1" to each (1/2" seam for both edges).


I cut the pieces from the blue fabric you see on the container and then sewed them together creating a sort of "tube" to slip the wastebasket into.  I slipped it on to check how it fit then removed it to re-sew my seams to make it snug, creating what appeared to be yoga pants for my trash!!

Once I had the size I wanted I turned down the top edge, pressed it, folded it under, and top-stitched to make it neat and tidy.


You can see that I also did a zigzag stitch on the side seams as I currently lack a serger (sigh....).

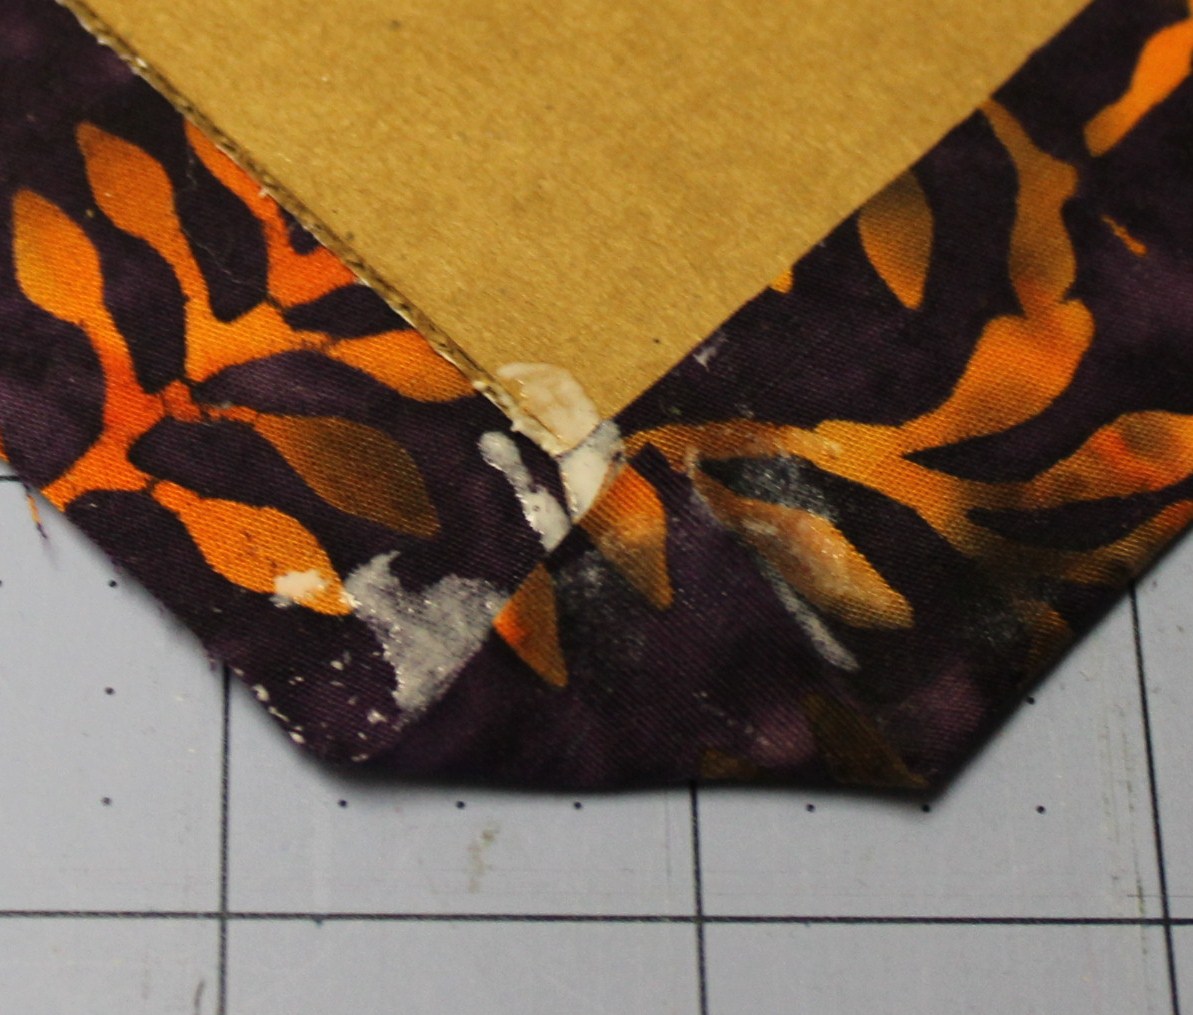
Then came the glue!  I slipped the "sleeve" back over the container and glued the fabric to the inside edge - I guess that I obviously NEVER think this will get dirty!


Once that was done and in place, I flipped it over and trimmed the excess off (OH MY, I WAITED TO BE SURE I HAD ENOUGH?  HEAVENS....) and then did a quick spray with the adhesive underneath and viola!


The girls thought it was lovely.  Hubby said: "It's nice, but shouldn't it have deer and such to match the room?"  I was matching the floor tiles, but okay... I'll make ANOTHER ONE (muhahahaha!) and put this in my studio!!

Have a wonderful day, all!
Carrie

Pin It

Monday, March 12, 2012

Not everything comes out how you want...OR "My first attempt at an earring holder"

Good morning!

Well, I spent some time working on a project like many I'd seen on Pinterest.  It looked easy: a frame, some wire (mine ended up being screening), a bit of paint... you know the drill.

I had to do it in stages, as painting was involved and basically it cost me $1.99 (for the used frame at Goodwill), so I can't complain.

Here's the process:


1. I began by disassembling and re-purposing a picture frame I picked up at Goodwill.   The glass may have use down the road.

2. I decided to paint it blue, as you can see.

3. It was kind of blah, so I took a darker blue and a scrunched up piece of tissue to give a bit of "texture" and blotted all over.


4.  At that point I was ready for the screen.  I was originally going to string 2 pieces of wire, and I may still re-do the project at some point, but I didn't have any on hand.  I did, or should I say Bri did, have a bit of screen scrap.


5.  So I measured and trimmed the screen to fit inside the frame, using handy dandy wire cutters.  Right, hubby forgot to mention trimming screening can HURT!  I got picked and scratched a few times... immediately deciding I didn't like working with screen!

6.  Once it was trimmed I stapled it into the frame (another opportunity for the wicked screen to bite me, which it did!)


7.  You will notice there was a piece of navy fabric there to back it, well, too dark, didn't show.  I decided to use a piece of colorful scrapbooking paper, which you can just barely see in the next photo.


I don't know.... it just didn't come out how I pictured.  My girls thought it was lovely and cool, so, maybe it's not as bad as I thought!

Oh well, my lesson there is two-fold:
#1.  Things don't come out as you planned;
#2.  They don't always come out perfect;
#3.  Maybe I work better in fabric than.... well, "other" mediums?  We shall see!

Happy crafting, all!
Carrie

Pin It

Saturday, March 10, 2012

Couple of quick necklaces

Good morning from snowy NH -
We haven't much of any all winter and we've had snow several times in March!! We are sooooo ready for spring around here!

Today is just a visual of a couple of necklaces I put together.


The purple one on the right was a pendant I purchased on Etsy - the ribbon it's on, which I LOVE, was $.50 from Walmart!

The one on the right was a Lia Sophia piece that I originally put the dichronic glass pendant on, but because you can change it up so easily, I put on a set of Pandora bead knock-offs on! I love them both!

Would you like your own dichronic pendant?  There are some lovely ones on Etsy, like this:

You can check it out here.

Pop me a note if you have other creative ideas!
Off to work on my next project....it involves a frame and wire...muhahahaha!

Have a great day!
Carrie

Pin It

Friday, March 9, 2012

Mounted "Creativity" Manifesto

I ran across this wonderful manifesto about creating and thought....hmmm... how can I work this up into a project?

I started with the download from clay-space.com and printed it.  I was trying to print it on some heavy art paper, as my original plan was to just frame it.  Well, the paper got caught and in the process of reprinting, it sent the art paper through and printed it on regular copier paper (the price for multitasking and not realizing it was happening!).

That made it a bit light weight - so I sprayed it on to the paper I had WANTED to use and then decided to fabric "frame" it.

Let's get creating!


I like Sulky spray adhesive.  I sprayed the back of the printed paper to adhere it to the heavy weight art paper.


I selected a piece of batik for the background "frame" and then zig zag stitched the paper to the fabric.


Due to the face I couldn't get the paper to stay perfectly still, it got a bit wonky, so I trimmed off the edges to even it up.  Gotta love the rotary cutter, just saying...


Next, I sprayed a piece of cardboard for the backing with Sulky and  centered the design and fabric on it.  To be honest, there was a bit of back and forth trimming to get that one right BEFORE spraying on the adhesive!!


Then, it's the magic of Mod Podge (of which I am going to try making my own... another posting!)

Paint a bit on the straight edge and then it's time to "work" the corners!


Fold the corner IN on itself


Add a bit more Mod Podge...


And then fold the edge up.  You will create this neat and tidy little corner that looks GREAT from the other side!

I love it!  I think I may make a few more for some of the creative people in my life!  The clay-space.com website linked to an original manifesto about life you can see here, which I may ALSO try! 

I am also thinking I need to figure out how it was done and create a manifesto of my own!!  We shall see!

Enjoy the day and have a GREAT weekend!
Carrie

Pin It

Thursday, March 8, 2012

Fabric Covered Headband

Good morning!

For the first time in 38 years (the last time I had long hair I was in 8th grade - you do the math...), I am letting my hair grow out. It's a bit of a big deal, well, at least for me. 38 years of many different styles (some good, some not so good)- but pretty much all VERY short.

Well, I'm experimenting, trying something new, stepping outside my box! If you've ever tried to grow out short hair, you'll know my struggles. Particularly since I am unwilling to let go of the bangs, the rest is in process, the bangs? Staying for now. To that end, I need to get "it " (meaning my hair in general) OUT of my face!

I haven't been successful with the cloth headbands so far - I will post a picture of one I love, it's so cute, but can't keep it in! Lumpy head, I guess. My best bet has been the $1 ones,   Keep your eye out at the box stores for sets for $1 - a GREAT deal!  A girl needs a bit of color, so I am playing around with covering them with fabric. I particularly like how this one came out AND it's so easy I can barely stand it!

You will need a headband to cover, fabric, a rotary cutter, ruler and a needle and thread.

Begin by cutting a 2" strip from the width of the fabric (44" in this case).

Fold the strip in half along it's length.

I didn't do a picture of this part, didn't have enough hands, but you need to make a little "pocket" to hold the end of the headband and then fold nice and tightly around it as you begin.

Once you have that on, begin winding the fabric around and around - I went over about 1/4" of the previous fold, keeping it nice and tight.


When you get to the other end, I like to use a "handy dandy clip" while I play around with how much I need to keep on, how I going to fold it, then cut it off.


Some quick stitches with a coordinating thread and viola! 


I would LOVE to see any you come up with!  Let us know!
Have a creative day, all!

Carrie

Pin It

Wednesday, March 7, 2012

St. Patrick's Day Rag Wreath

So today's post (sorry it's a bit late in the day....got away from me!) is about a combination I found on Pinterest: a rag wreath and a "rag" shamrock that I saw.

First, there was a sweet "rag" shamrock - her's is MUCH sweeter than mine, but, I learned some things, like size DOES make a difference... just sayin'...

You can find this available a link on my Pinterest board here.

and here is the wreath that got me thinking:
You can find it here .

So here are a FEW things I learn in this process:
  1. It's OKAY to build the wreath on a wire hanger - you DON'T need to add anything to make it stronger. 
  2. It's OKAY because if you do build it on a hanger, all you have to do is slide the pieces together to make it nice and full.
  3. If YOU decide to "build" a frame, with say.... oh I don't know, a cardboard ring, YOU will NOT be able to slide the fabric. YOU will have to squoosh and keep finding ways to fill out the wreath...just sayin'...
  4. The hearts you make like a rag quilt?  Make them a bit smaller than I did and perhaps rounder?  That would make a better looking shamrock.
So, that being said, here is my rendition of a St. Paddy's Day wreath!  It's cute.  I completed it.  Life is good!


If you decide to make one, show us!!  Send an email, post on the Facebook page, Pin it!!  Muahahahaha!

Till next we meet,
Carrie

Pin It

Tuesday, March 6, 2012

Rollo Candy Cookies... aka: chocolate addiction!

Good morning, everyone!

I promised to start posting to my Pinterest Pinning Party, so it begins!

The first goodie I'd like to share is Rollo Candy Cookies! Oh my, but they WERE delish ... even the big glop that was several cookies all gooey together when DD #2 tried to scrape too warm cookies off the cookie sheet - actually, that was more like a cookie candy!!

Here are the LAST two to survive - and they only lasted a few minutes after the picture, and that wasn't when they were warm!


Wouldn't you LOVE to know how to make these?  Pop on over to My Baking Addiction and you'll find it there.  The key, according to my daughters, is to freeze the Rollos - if you don't, well.... you can just imagine!  You can find her on Facebook, as well, at My Baking Addiction.

WARNING: While you are there I WILL NOT BE HELD RESPONSIBLE for any addictive cooking that results!!  Muahahahahaha!
Pin It